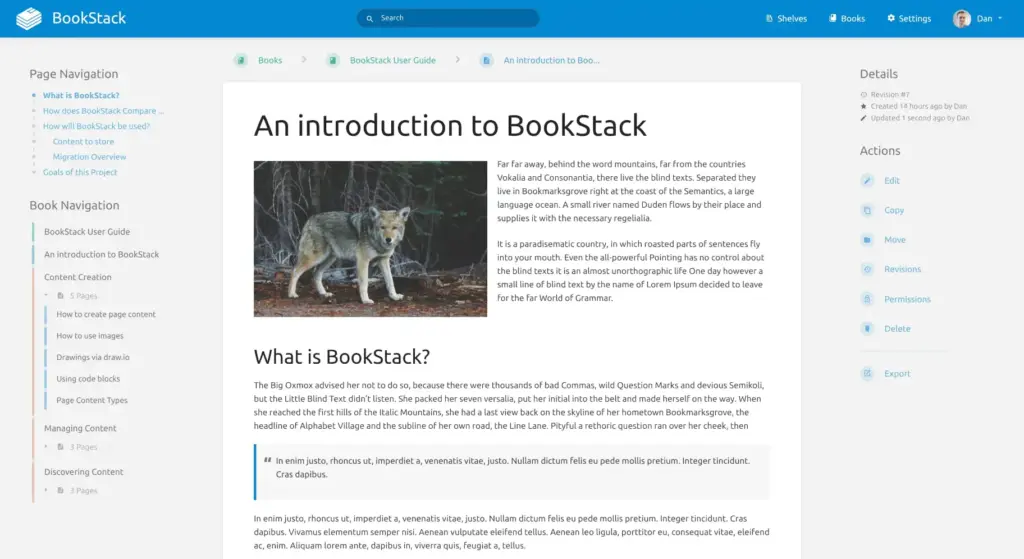
BookStack is an open-source knowledge‐base / documentation/wiki platform built on Laravel (a PHP framework) using MySQL/MariaDB for storage. It supports a hierarchical structure of books → chapters → pages, offers built-in search, roles/permissions, WYSIWYG and markdown editing. It’s simple but powerful, good for team docs, manuals, or personal knowledge bases.

Self-hosting gives you control: over your data, your backups, your security settings, and the ability to customize. It may take more setup and upkeep than “managed,” but gives you flexibility.
Before you start, make sure you have:
- A DigitalOcean account (you’ll need it to spin up a droplet, manage SSH keys, etc.).
- A domain name (optional but highly recommended if you want HTTPS and friendly URLs).
- Basic familiarity with the command line, Linux administration, and web server configuration (e.g. Nginx or Apache).
Here’s how we’ll proceed:
- Create a Droplet on DigitalOcean
- Initial server setup (updates, firewall, etc.)
- Install required dependencies (PHP, database, etc.)
- Fetch & configure BookStack
- Web server setup (Nginx or Apache)
- Secure with HTTPS via Let’s Encrypt
- Maintenance: backups, updates
Step one… Create a DigitalOcean Droplet
- Log in to your DigitalOcean dashboard.
- Create a new droplet. Choose an Ubuntu LTS (for example 22.04 or later).
- Pick a size: for small team / low traffic usage, a droplet with 2 vCPUs and 4 GB RAM works well. If many users or heavy content, scale accordingly.
- Select a region close to your users.
- Provide SSH key(s) so you won’t need to manage passwords.
- Enable backups if you want automated snapshots.
Once created, note the IP address, SSH credentials, etc.
Initial Server Setup
SSH into the droplet:
ssh root@YOUR_DROPLET_IPThen:
sudo apt update
sudo apt upgrade -yCreate a non-root sudo user (for better security):
adduser myuser
usermod -aG sudo myuserSet up basic firewall rules (using ufw for example):
ufw allow OpenSSH
ufw allow 'Nginx Full'   # or Apache if you use Apache
ufw enableDisable root login via SSH if desired, etc.
Install Dependencies
BookStack requires:
- PHP ≥ 8.2 with various extensions (gd, dom, iconv, mbstring, mysqlnd / pdo_mysql, xml, zip, openssl, tokenizer, etc.).
- MySQL ≥ 5.7 or MariaDB ≥ 10.2.
- Composer (dependency manager).
Here’s how you might install them (on Ubuntu 22.04):
sudo apt install -y nginx     # or apache2
sudo apt install -y mysql-server
sudo apt install -y php php-fpm php-mysql php-gd php-dom php-xml php-mbstring php-zip php-openssl php-tokenizer
sudo apt install -y git curl unzipInstall Composer:
cd /tmp
curl -sS https://getcomposer.org/installer | php
sudo mv composer.phar /usr/local/bin/composerEnsure you have php-fpm running (if using Nginx) or Apache’s PHP module enabled.
Download & Configure BookStack
Switch to a directory under your non-root user (e.g. /var/www/bookstack):
sudo mkdir -p /var/www/bookstack
sudo chown myuser:myuser /var/www/bookstack
cd /var/www/bookstackClone BookStack:
git clone https://github.com/BookStackApp/BookStack.git --branch release --single-branch .Copy configuration and set up environment variables:
cp .env.example .envEdit .env (using nano or vim), set:
APP_URLto your domain or server IP (withhttps://if you will use HTTPS)- Database credentials (name, username, password)
- Mail settings (if you want email notifications or password resets)
Generate application key:
composer install --no-dev
php artisan key:generateRun migrations:
php artisan migrateEnsure storage directories are writable:
sudo chown -R www-data:www-data storage bootstrap/cache public/uploads
sudo chmod -R 755 storage bootstrap/cache public/uploads(If you use Nginx, www-data is typical; adjust if using different user.)
Web Server Setup
If using Nginx
Create a server block file, e.g. /etc/nginx/sites-available/bookstack:
server {
    listen 80;
    server_name your.domain.com;  # replace with your domain

    root /var/www/bookstack/public;
    index index.php;

    location / {
        try_files $uri $uri/ /index.php?$query_string;
    }

    location ~ \.php$ {
        include snippets/fastcgi-php.conf;
        fastcgi_pass unix:/var/run/php/php8.2-fpm.sock;  # adjust PHP version/path
        fastcgi_param SCRIPT_FILENAME $document_root$fastcgi_script_name;
        include fastcgi_params;
    }

    location ~* \.(js|css|png|jpg|jpeg|gif|ico|svg)$ {
        try_files $uri =404;
    }
}Enable it:
sudo ln -s /etc/nginx/sites-available/bookstack /etc/nginx/sites-enabled/
sudo nginx -t
sudo systemctl reload nginxIf using Apache
You’ll set up a VirtualHost pointing to bookstack/public, enable rewrite, ensure .htaccess works, etc. But Nginx tends to be more efficient and more commonly used for modern BookStack installs.
HTTPS: Secure with Let’s Encrypt
Install Certbot:
sudo apt install certbot python3-certbot-nginxObtain and install certificate:
sudo certbot --nginx -d your.domain.comFollow prompts. Certbot will edit your Nginx config (or offer to) to redirect HTTP → HTTPS.
Check renewal:
sudo systemctl status certbot.timerFirst Access & Admin Setup
Once web server and HTTPS are working, navigate to https://your.domain.com. You should see the BookStack setup/login screen.
Use the default admin credentials (often admin@admin.com / password) and immediately change them. Configure your profile, permissions, etc.
Maintenance, Upgrading, and Backups
- Backups: regularly back up the database and the uploaded files (usually contents of
/storage/uploadsand maybe/public/uploads). Use cron jobs or DigitalOcean snapshot/backups. - Upgrades: pull latest BookStack release from GitHub, run composer / artisan migrate etc. Make sure to test on staging or backup first.
- Security: keep OS, PHP, database patched. Use strong passwords. Limit SSH login, use SSH keys, disable root.
- Monitoring & logs: monitor server load, disk space; check BookStack logs (
storage/logs) for errors.
Optional: Deploy via Docker (containerized)
If you prefer Docker / Docker Compose, you can do that instead of manual PHP install. The general pattern:
version: '3'

services:
  bookstack:
    image: ghcr.io/linuxserver/bookstack:latest
    environment:
      - APP_URL=https://your.domain.com
      - DB_HOST=bookstack_db
      - DB_USER=bookstack
      - DB_PASS=YOUR_DB_PASSWORD
      - DB_DATABASE=bookstack
    volumes:
      - ./data:/config
    depends_on:
      - bookstack_db
    ports:
      - "8080:80"

  bookstack_db:
    image: mariadb:latest
    environment:
      - MYSQL_ROOT_PASSWORD=ROOTPASSWORD
      - MYSQL_DATABASE=bookstack
      - MYSQL_USER=bookstack
      - MYSQL_PASSWORD=YOUR_DB_PASSWORD
    volumes:
- ./db:/var/lib/mysqlThen you’d use Nginx (on host or separate container) as reverse proxy and setup HTTPS similarly. Docker simplifies dependency management but adds layers to debug if things go wrong.
Common pitfalls & tips
- Not using correct PHP version or missing extensions causes weird errors (e.g. blank pages, missing image uploads).
- Permissions on storage/public/upload directories are often mis-configured; ensure webserver user has write access.
- Forgetting to set
APP_URLcorrectly can break links, asset loading, redirects. - Let’s Encrypt renewals must work (port 80 or 443 must be reachable).
- On DigitalOcean, ensure firewall and any network settings allow HTTP/HTTPS traffic.


