


Perplexica is an open-source AI search engine that blends web retrieval (via SearxNG) and large language models (LLMs) to generate concise answers with cited sources. It aims to mimic the user experience of Perplexity.ai but in a self-hosted, privacy-preserving way.
You can host your own version, choose which LLM or embedding models to use (locally via Ollama or via external APIs), and modify its behavior as needed. Many community guides assume you run it on a local machine; here we’ll adapt that to DigitalOcean’s ecosystem so it runs in the cloud reliably.
Before you begin, you’ll need a DigitalOcean account with enough quota to spin up droplets or an App on their App Platform. (If you don’t already have an account, go ahead and set one up.)
Architecture & Deployment Strategy
Perplexica typically consists of:
- Frontend: Next.js / React UI
- Backend / API layer: Node.js / Express
- Search engine: SearxNG (metasearch aggregator)
- Model providers / embeddings: either local via Ollama, or external APIs (OpenAI, Groq, etc.)
In Docker setups, a docker-compose.yaml includes services for frontend, backend, and SearxNG.
You must configure environment variables (e.g. API keys, hostnames, endpoints) so the frontend and backend can communicate, and so Perplexica can reach SearxNG and the model services.
On DigitalOcean, you can deploy via:
- Droplets (VMs): manually provision one or more VMs, set up Docker (or Docker Compose), and deploy Perplexica there.
- App Platform / Managed Containers: wrap your frontend/backend as container images, push them to a registry, and use DigitalOcean’s App Platform for deployment. This can simplify scaling, HTTPS, and networking.
I’ll cover both approaches; choose the one that best fits your needs.
Prerequisites (what you need before starting)
- A DigitalOcean account, with capacity to create droplets, load balancers, or apps.
- A domain name (or subdomain) to point to your Perplexica instance (optional but strongly recommended).
- Basic comfort with SSH, Linux command line, Docker and Docker Compose, and editing environment files.
- If using a local model (via Ollama), you’ll need to install and host Ollama in your setup (either on the same server or separate).
- Enough compute (CPU / memory) to host your model + inference load; for modest usage, a droplet with 4–8 GB RAM is a reasonable starting point.
Approach A: Deploy on a Droplet with Docker Compose
This is the most flexible approach and often preferred in self-hosting scenarios.
1. Provision a Droplet
- Choose an Ubuntu (or Debian) LTS image.
- Pick a droplet size that matches your expected load (start small, e.g. 2 vCPUs + 4 GB RAM, scale later).
- Open ports: HTTP (80) / HTTPS (443) / any internal ports you’ll need (e.g. 3000, 3001).
- SSH in.
2. Install Docker & Docker Compose
On Ubuntu, for example:
sudo apt update
sudo apt install -y docker.io docker-compose
sudo systemctl enable docker
sudo usermod -aG docker $USERThen log out and log back in to apply the Docker group permissions.
3. Install Ollama (if you plan to use a local LLM)
If you will rely on a local model via Ollama (so you control everything):
curl -fsSL https://ollama.com/install.sh | shThen pull your chosen LLMs. For example:
ollama pull llama3:latest
ollama pull nomic-embed-text:latestYou might also need to allow Ollama to listen on all interfaces rather than local only. In some user guides, you edit the ollama.service override:
[Service]
Environment="OLLAMA_HOST=0.0.0.0"Then reload and restart systemd:
sudo systemctl daemon-reload
sudo systemctl restart ollamaThis lets external services (i.e. Perplexica backend) connect to Ollama over the network.
4. Clone Perplexica repository & configure
git clone https://github.com/ItzCrazyKns/Perplexica.git
cd PerplexicaCopy or rename the sample environment file:
cp .env.example .envEdit .env to set the necessary variables. Important ones include:
NEXT_PUBLIC_API_URL— the base URL where backend is reachable (e.g.http://yourserver:3001/api)NEXT_PUBLIC_WS_URL— websocket endpoint (e.g.ws://yourserver:3001)- Model & embedding provider settings (e.g. pointing to Ollama or API keys)
- Any secrets / keys required by the backend
Ensure that the backend and frontend services in docker-compose.yaml pick up those environment settings. In some guides, the docker-compose.yaml references:
perplexica-frontend:
  build:
    context: .
    dockerfile: app.dockerfile
    args:
      - NEXT_PUBLIC_API_URL=http://127.0.0.1:3001/api
      - NEXT_PUBLIC_WS_URL=ws://127.0.0.1:3001
  depends_on:
- perplexica-backendYou may need to adjust those args to match your server hostname or internal network.
5. Start the stack
From inside the repository:
docker-compose up -d --buildThis command builds images (frontend, backend) if necessary and launches all containers including SearxNG. You can check logs with:
docker-compose logs -fIf everything is configured properly, you should see the frontend connect to the backend and backend communicate with SearxNG and your model service.
6. Set up reverse proxy (Nginx) and SSL (Let’s Encrypt)
To expose Perplexica on the web securely, it’s a good idea to put Nginx in front as a reverse proxy.
Here’s a minimal /etc/nginx/sites-available/perplexica:
server {
    listen 80;
    server_name your.domain.com;

    location / {
        proxy_pass http://localhost:3000;  # frontend
        proxy_set_header Host $host;
        proxy_set_header X-Real-IP $remote_addr;
        proxy_set_header X-Forwarded-For $proxy_add_x_forwarded_for;
        proxy_http_version 1.1;
        proxy_set_header Upgrade $http_upgrade;
        proxy_set_header Connection "upgrade";
    }

    location /api/ {
        proxy_pass http://localhost:3001/api/;
        proxy_set_header Host $host;
        proxy_set_header X-Real-IP $remote_addr;
        proxy_set_header X-Forwarded-For $proxy_add_x_forwarded_for;
    }
}Enable it (symlink to sites-enabled) and test:
sudo ln -s /etc/nginx/sites-available/perplexica /etc/nginx/sites-enabled/
sudo nginx -t
sudo systemctl restart nginxThen run Certbot to get a free SSL certificate:
sudo apt install certbot python3-certbot-nginx
sudo certbot --nginx -d your.domain.comThat will automatically configure SSL and redirect HTTP → HTTPS.
7. Testing & validation
- Visit
https://your.domain.comin browser: you should see the Perplexica UI. - Enter queries and verify that responses come quickly with citations.
- Inspect logs (
docker-compose logs) to catch errors (e.g. connection refused to model or SearxNG). - If using Ollama, test its API endpoints (embedding, chat) directly to make sure model serving is working.
8. Updating / maintenance
When a new version of Perplexica is released:
docker-compose down --rmi all
git pull
docker-compose up -d --buildThis sequence tears down containers and rebuilds with the latest code.
If you change .env variables or model configurations, restart only the affected containers or the full stack as needed.
Approach B: Deploy via DigitalOcean App Platform (Container-based)
If you prefer less maintenance of infrastructure, you can containerize the frontend and backend (with SearxNG) and deploy via DigitalOcean’s App Platform. This gives you managed SSL, auto-scaling, network routing, etc.
1. Build container images & push to registry
- Create Dockerfiles for frontend and backend. (Perplexica’s repo already includes
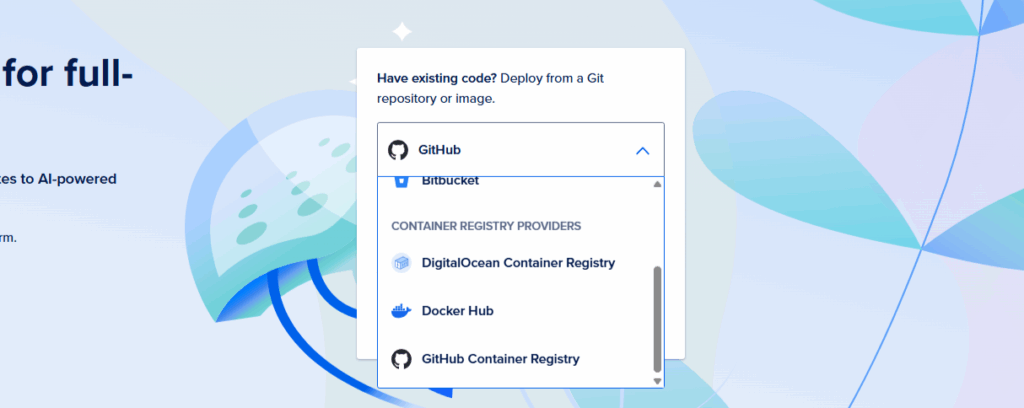
app.dockerfileand adocker-compose.yamlthat defines building steps.) - Push those images to Docker Hub, GitHub Container Registry, or DigitalOcean Container Registry (DOCR).
- Ensure your images are built for
linux/amd64(App Platform currently supports that).
2. Create an App in DigitalOcean
- In the DigitalOcean Control Panel, click Create → Apps.
- Choose “Container Registry / Docker” as source.
- Select your frontend image and backend + SearxNG image(s).
- For each service, configure:
- HTTP ports (e.g. 3000 for frontend, 3001 for backend)
- Environment variables (same ones as
.env) - Instance size / scaling rules
- Link services (frontend depends_on backend)
- Set routing rules so
/api/*requests go to backend container and other paths go to frontend. - You can add a custom domain and enable HTTPS automatically. App Platform handles SSL and routing.
3. Set environment variables & secrets
In the App Platform UI, under each component, define any environment variables (e.g. API keys, model endpoints). Use secret variables for sensitive values.
4. Deploy & test
Trigger deployment. Once finished, test your domain or application URL. Verify the frontend communicates with the backend, and backend with model/SearxNG. Monitor logs via the App UI.
5. Update flow
When you push new images (e.g. tag version), you can enable auto-deploy for DOCR images so the app redeploys automatically.
Common Issues & Troubleshooting
| Symptom | Likely cause | Solution |
|---|---|---|
| Frontend cannot reach backend | Wrong NEXT_PUBLIC_API_URL or CORS not allowed | Check environment variables, proxy settings, network settings |
| Backend cannot reach Ollama or model API | Ollama not listening externally or wrong host | Configure Ollama host binding and firewall rules |
| SearxNG errors / no search results | Searx not properly initialized or rate limiting | Check SearxNG logs, enable JSON output, disable rate limiting in its config |
| SSL / domain not working | DNS not pointing correctly, Nginx misconfig | Confirm A/AAAA record and Nginx site config |
| High latency / resource exhaustion | Insufficient memory / CPU | Scale droplet or break components into separate servers |
A few notes from community experience:
- Many guides recommend having SearxNG and Perplexica in the same Docker stack; this simplifies networking.
- Ollama configuration often needs adjustment (especially binding to
0.0.0.0) to allow external access. - Users report that embedding and chat models need to be chosen carefully for performance (e.g. Mistral Nemo, Qwen) depending on your hardware.
Final remarks & next steps
You now have two paths to host Perplexica on DigitalOcean: a more hands-on droplet + Docker Compose route, or a more managed container / App Platform path. The droplet route gives you maximum control and flexibility; the App Platform route simplifies scaling and management at the cost of some constraints.
Once your instance is stable, you can extend it by:
- Adding user authentication / access control
- Integrating additional LLMs or embedding models
- Monitoring and metrics (e.g. Prometheus, Grafana)
- Backup strategies for logs, indexes, and model data
- Auto-scaling or separating frontend/backend into different VMs or services


 in PostgreSQL 18")