")
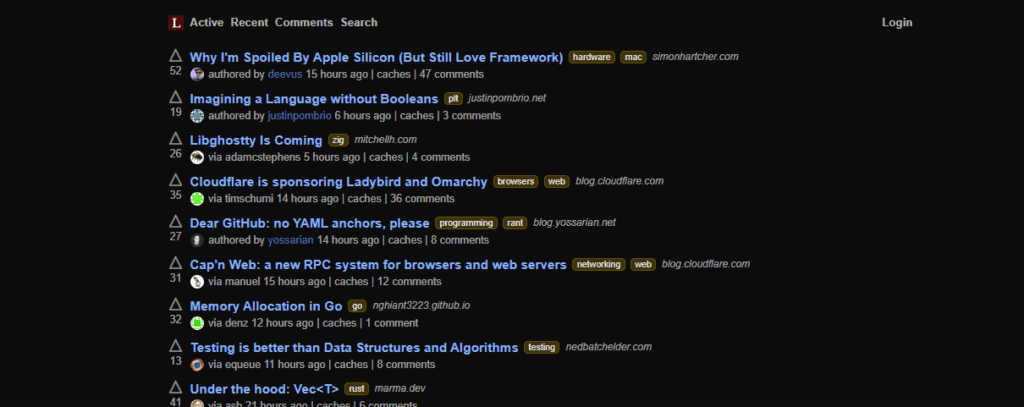
If you’ve ever wanted your own Hacker News–style community, Lobsters is a solid starting point. It’s the code that powers [lobste.rs], written in Ruby on Rails, and designed for link aggregation and discussion with tag-based moderation, page caching, and a pragmatic, “use Rails defaults” philosophy. In production, it historically runs on MariaDB; newer work leans into Rails-native pieces like Solid Queue for jobs.
You’ll deploy it on a single Ubuntu Droplet, fronted by Nginx, using Puma for the web app and systemd to supervise both web and job workers. You’ll need a DigitalOcean account and a domain you can point at the server.
What you’ll build
You’ll spin up a fresh Ubuntu VM on DigitalOcean, install Ruby (matching Lobsters’ required version), install MariaDB, compile assets, wire up Solid Queue in production, and put Nginx in front with Let’s Encrypt TLS. Finally, you’ll create your first admin user and flip on the two cron jobs Lobsters expects. The Lobsters README provides current production knobs (e.g., DATABASE_URL using the trilogy:// MySQL driver, a Solid Queue process, and a few environment variables), which we’ll mirror in a hand-rolled deployment rather than using Hatchbox.
1) Create the Droplet and prepare the box
Create an Ubuntu 24.04 LTS Droplet (2 GB RAM is comfortable) and note its public IPv4 address. Add your SSH key when creating the Droplet so you can log in without a password. If you’ll send mail from this host (password resets, reply-by-email), set the Droplet’s hostname to your domain; DigitalOcean uses that FQDN to auto-provision reverse DNS (PTR), which many mail receivers require.
SSH in as root, create a deploy user, and lock down the basics.
# as root
adduser deploy
usermod -aG sudo deploy
mkdir -p ~deploy/.ssh && cp ~/.ssh/authorized_keys ~deploy/.ssh/ && chown -R deploy:deploy ~deploy/.ssh

# uncomplicated firewall
ufw allow OpenSSH
ufw allow http
ufw allow https
ufw --force enableLog out and back in as deploy for the remainder.
2) Install OS packages, Ruby (via rbenv), Node/Yarn
Lobsters specifies its Ruby version in .ruby-version. Use rbenv so the server matches that exactly.
# deps to compile Ruby and gems, plus Node/Yarn for asset builds
sudo apt update
sudo apt install -y build-essential rustc git curl pkg-config \
  libssl-dev libyaml-dev zlib1g-dev libreadline-dev libgmp-dev \
  libncurses5-dev libffi-dev libgdbm6 libgdbm-dev libdb-dev uuid-dev \
  nodejs npm

# rbenv + ruby-build
git clone https://github.com/rbenv/rbenv.git ~/.rbenv
echo 'export PATH="$HOME/.rbenv/bin:$PATH"' >> ~/.bashrc
echo 'eval "$(rbenv init - bash)"' >> ~/.bashrc
exec bash
git clone https://github.com/rbenv/ruby-build.git "$(rbenv root)"/plugins/ruby-buildClone the app so rbenv can read the desired version:
cd ~
git clone https://github.com/lobsters/lobsters.git
cd lobsters
rbenv install  "$(cat .ruby-version)"
rbenv local     "$(cat .ruby-version)"
ruby -vInstall Bundler and Yarn:
gem install bundler
npm install --global yarnDigitalOcean’s rbenv guide covers these steps on Ubuntu if you want extra context. The key is: install from .ruby-version, don’t guess.
3) Install and configure MariaDB
Lobsters uses a SQL backend (MariaDB in production today), with the Rails app pointing to it via DATABASE_URL that looks like trilogy://user:pass@DBHOST/lobsters. We’ll create a database and a dedicated user.
sudo apt install -y mariadb-server
sudo systemctl enable --now mariadb

# secure basics
sudo mysql -u root <<'SQL'
CREATE DATABASE lobsters CHARACTER SET utf8mb4 COLLATE utf8mb4_unicode_ci;
CREATE USER 'lobsters'@'localhost' IDENTIFIED BY 'change-this-db-password';
GRANT ALL PRIVILEGES ON lobsters.* TO 'lobsters'@'localhost';
FLUSH PRIVILEGES;
SQLIf you’re splitting DB onto a managed instance later, keep the same schema and switch the host in DATABASE_URL.
4) App configuration: credentials, production initializer, ENV
Lobsters expects Rails credentials and a small production initializer. The README shows the production knobs and the current environment variables used in their hosted setup; we’ll adapt those to a single Droplet.
cd ~/lobsters

# create encrypted credentials (store API keys/secret_key_base here)
EDITOR="${EDITOR:-nano}" bin/rails credentials:edit
# If you need a key manually: bin/rails secret

# copy and edit the production initializer the project ships as a sample
cp config/initializers/production.rb.sample config/initializers/production.rb
# open it and set your site's name and domainCreate a .env file to centralize environment variables for systemd:
cat > ~/.lobsters-env <<'ENVVARS'
RAILS_ENV=production
RACK_ENV=production
RAILS_LOG_TO_STDOUT=true
RAILS_MAX_THREADS=10
SECRET_KEY_BASE=CHANGE_ME # or rely on credentials; only set one source
PORT=3000

# point Rails at MariaDB using the trilogy driver
DATABASE_URL=trilogy://lobsters:change-this-db-password@localhost/lobsters
BUNDLE_WITHOUT=development:test
ENVVARS5) Install gems, set up DB, and build assets
cd ~/lobsters
bundle config set without 'development test'
bundle install

# set up schema and any seed data the project provides
bin/setup

# if bin/setup already migrated, you’re set; otherwise:
bin/rails db:migrate

# precompile assets for production
bin/rails assets:precompileThe Lobsters setup script (bin/setup) initializes dependencies and the database in line with the README’s instructions.
6) Run background jobs with Solid Queue (systemd)
Lobsters uses Rails’ Solid Queue as its Active Job backend in production. You’ll run a dedicated worker process under systemd so it starts on boot and restarts on failure.
# user service unit for Solid Queue
mkdir -p ~/.config/systemd/user
cat > ~/.config/systemd/user/lobsters-solid-queue.service <<'UNIT'
[Unit]
Description=Lobsters Solid Queue
After=network.target mariadb.service

[Service]
Type=simple
WorkingDirectory=%h/lobsters
EnvironmentFile=%h/.lobsters-env
ExecStart=%h/.rbenv/shims/bundle exec rails solid_queue:start
Restart=always
RestartSec=3
TimeoutStopSec=15

[Install]
WantedBy=default.target
UNIT

# enable lingering so user services run without an interactive login
sudo loginctl enable-linger "$(whoami)"

systemctl --user daemon-reload
systemctl --user enable --now lobsters-solid-queue
systemctl --user status lobsters-solid-queue --no-pager7) Run the web app with Puma (systemd) and put Nginx in front
Puma is the default Rails app server; we’ll supervise it with systemd and proxy through Nginx. This keeps the stack simple and production-grade.
# systemd service for the web app
mkdir -p ~/.config/systemd/user
cat > ~/.config/systemd/user/lobsters-web.service <<'UNIT'
[Unit]
Description=Lobsters Rails (Puma)
After=network.target mariadb.service

[Service]
Type=simple
WorkingDirectory=%h/lobsters
EnvironmentFile=%h/.lobsters-env
ExecStart=%h/.rbenv/shims/bundle exec puma -C config/puma.rb
Restart=always
RestartSec=3
TimeoutStopSec=15

[Install]
WantedBy=default.target
UNIT

systemctl --user daemon-reload
systemctl --user enable --now lobsters-web
systemctl --user status lobsters-web --no-pagerInstall and configure Nginx as a reverse proxy:
sudo apt install -y nginx
sudo tee /etc/nginx/sites-available/lobsters >/dev/null <<'NGINX'
server {
  listen 80;
  server_name example.org www.example.org;

  access_log /var/log/nginx/lobsters.access.log;
  error_log  /var/log/nginx/lobsters.error.log;

  location / {
    proxy_pass http://127.0.0.1:3000;
    proxy_set_header Host              $host;
    proxy_set_header X-Forwarded-Proto $scheme;
    proxy_set_header X-Forwarded-For   $proxy_add_x_forwarded_for;
    proxy_read_timeout 60s;
  }
}
NGINX
sudo ln -s /etc/nginx/sites-available/lobsters /etc/nginx/sites-enabled/lobsters
sudo nginx -t && sudo systemctl reload nginx8) Add your domain and TLS
Point your domain at the Droplet’s IP with an A record (and AAAA if you use IPv6). If you delegate DNS to DigitalOcean, you’ll add the domain in the Networking → Domains UI, then create an A record to the Droplet. Once DNS resolves, request a Let’s Encrypt certificate.
# certbot will install a cert and update nginx for TLS
sudo apt install -y certbot python3-certbot-nginx
sudo certbot --nginx -d example.org -d www.example.org
# follow prompts; choose redirect to enforce HTTPSIf you plan to send mail from the host, the earlier PTR/hostname note applies; set the Droplet’s hostname to your domain so reverse DNS aligns.
9) Create your first admin user, category, and tag
Lobsters expects at least one category and one tag to function fully. The README suggests you’ll do initial admin bootstrap from the Rails console.
cd ~/lobsters
bin/rails console
# in the console:
u = User.new(username: "admin", email: "you@example.org")
u.password = "change-this-password"
u.is_admin = true
u.save!

Category.create!(category: "programming", description: "General programming")
Tag.create!(tag: "ruby", description: "Ruby")
exitVisit your domain and log in with the admin user to configure the site name, tags, and any account-linking features you enabled in credentials.
10) Cron jobs the app expects
Lobsters relies on two cron jobs in production. In the README they appear as expire_page_cache (every minute) and script/lobsters-cron (every 5 min). Add them under the deploy user so they survive reboots.
crontab -e
# add:
* * * * *  cd /home/deploy/lobsters && script/expire_page_cache
*/5 * * * * cd /home/deploy/lobsters && /home/deploy/.rbenv/shims/bundle exec script/lobsters-cron11) Quick test checklist
After TLS and cron are in place:
# web reachable?
curl -I https://example.org/

# background jobs alive?
systemctl --user --no-pager status lobsters-solid-queue

# db connectivity via Rails?
cd ~/lobsters && bin/rails runner "puts ActiveRecord::Base.connection.current_database"

# cache expiry cron executing?
grep expire_page_cache /var/log/syslog | tailIf Solid Queue stalls, verify the systemd user instance is enabled with “linger,” and that RAILS_ENV=production is set in your EnvironmentFile. Solid Queue is database-backed; DB errors propagate directly to workers, so check MariaDB logs if you see repeated restarts.
The README mentions the core team is working toward SQLite for simplicity. If you want to follow that path later, the migration is mostly ENV changes and a data move; otherwise, pointing DATABASE_URL at a managed MariaDB instance on DigitalOcean cleans up your single server and gives you point-in-time backups. The app itself doesn’t change—just the connection string.
Closing thoughts
You now have a working Lobsters instance on a single Droplet: Puma app server, Solid Queue background jobs, Nginx + Let’s Encrypt in front, and MariaDB underneath. From here, the real work is community building. If you want to track upstream changes, keep lobsters as a git remote and routinely merge updates; the README’s production section is also the canonical place to spot configuration changes (e.g., ENV vars or job runner tweaks) before upgrading.
Appendix: full Nginx TLS server block (post-Certbot)
If you prefer to write your own TLS server block instead of Certbot managing it:
server {
  listen 80;
  server_name example.org www.example.org;
  return 301 https://$host$request_uri;
}

server {
  listen 443 ssl http2;
  server_name example.org www.example.org;

  ssl_certificate     /etc/letsencrypt/live/example.org/fullchain.pem;
  ssl_certificate_key /etc/letsencrypt/live/example.org/privkey.pem;

  add_header X-Frame-Options DENY;
  add_header X-Content-Type-Options nosniff;

  location / {
    proxy_pass http://127.0.0.1:3000;
    proxy_set_header Host              $host;
    proxy_set_header X-Forwarded-Proto $scheme;
    proxy_set_header X-Forwarded-For   $proxy_add_x_forwarded_for;
    proxy_read_timeout 60s;
  }
}Appendix: minimal config/puma.rb (if the repo doesn’t ship one)
# config/puma.rb
max_threads = Integer(ENV.fetch("RAILS_MAX_THREADS", 10))
min_threads = Integer(ENV.fetch("RAILS_MIN_THREADS", max_threads))
threads min_threads, max_threads

port        ENV.fetch("PORT", "3000")
environment ENV.fetch("RAILS_ENV", "production")
workers     Integer(ENV.fetch("WEB_CONCURRENCY", 2))

preload_app!

plugin :tmp_restartAppendix: troubleshooting notes
- Ruby version won’t install: make sure you installed build deps (OpenSSL, zlib, readline, gdbm, yaml) and are using rbenv on the version pinned by
.ruby-version. - Jobs aren’t running: confirm
systemctl --user statusfor the Solid Queue service and that your database is reachable; Solid Queue uses the DB, so DB lockups or permissions can halt workers. - Email lands in spam: verify hostname ↔︎ PTR alignment on DigitalOcean and warm up the IP; brand-new VPS IPs often inherit poor reputation.