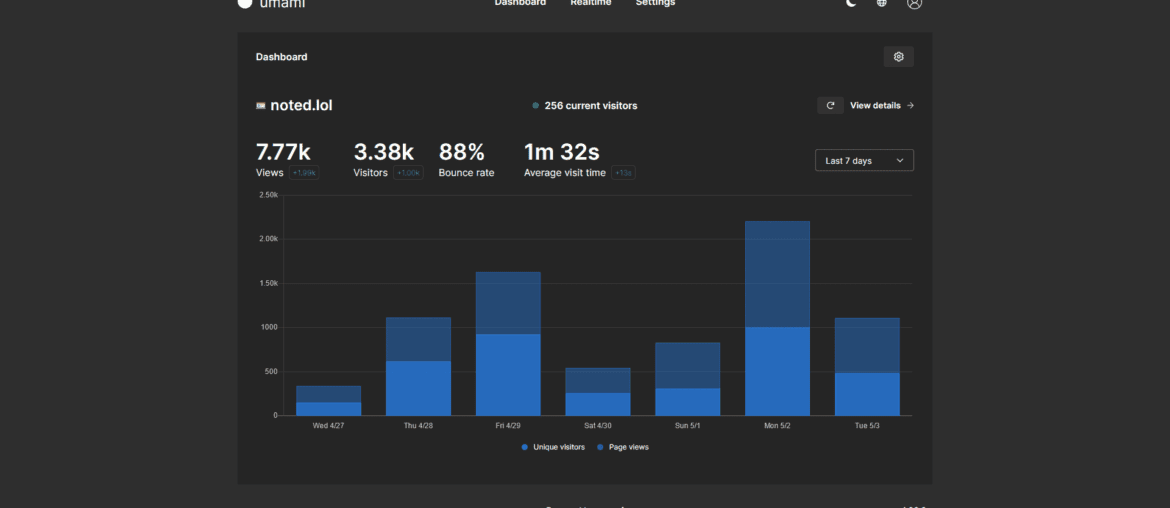
Umami is a lightweight, privacy-focused web analytics app built by developers who wanted the essentials—pageviews, visitors, campaigns, events—without cookies, invasive profiling, or a sprawling UI. It runs as a small Node.js service backed by PostgreSQL or MySQL, and you can host it yourself in a couple of containers. You’ll need a DigitalOcean account to spin up the server; once you have that, the rest is just routine Linux, Docker, and a reverse proxy.
You’ll provision an Ubuntu Droplet on DigitalOcean, install Docker + Docker Compose, run Umami with PostgreSQL via a docker-compose.yml, and place Nginx + Let’s Encrypt in front for HTTPS at https://analytics.dropletdrift.com. The compose stack keeps your app and database in tidy, restartable services; Nginx handles TLS and clean URLs.
Prerequisites
- A domain with DNS you can edit (create
analytics.dropletdrift.comA/AAAA pointing to your Droplet). - A fresh Ubuntu 22.04/24.04 Droplet with a non-root sudo user.
- Docker and Docker Compose (the modern
docker composeplugin). If you haven’t installed them on Ubuntu before, DigitalOcean’s guides are dependable.
Create and secure the Droplet
Choose a basic plan (1–2 vCPU, 1–2 GB RAM is enough for small sites), select the latest Ubuntu LTS image, add your SSH key, and deploy. SSH in, update packages, and enable a simple firewall that allows SSH and later Nginx:
sudo apt update && sudo apt -y upgrade
sudo apt -y install ufw
sudo ufw allow OpenSSH
sudo ufw enableThis gives you a patched baseline while we install Docker. We’ll open HTTP/HTTPS after Nginx is in place. (DigitalOcean’s Docker and Nginx + TLS patterns assume exactly this setup.)
Install Docker and Docker Compose
On Ubuntu, follow the standard CE install, then verify the Compose plugin:
# Install Docker CE
sudo apt -y install ca-certificates curl gnupg
sudo install -m 0755 -d /etc/apt/keyrings
curl -fsSL https://download.docker.com/linux/ubuntu/gpg | sudo gpg --dearmor -o /etc/apt/keyrings/docker.gpg
echo \
  "deb [arch=$(dpkg --print-architecture) signed-by=/etc/apt/keyrings/docker.gpg] \
  https://download.docker.com/linux/ubuntu $(. /etc/os-release && echo $UBUNTU_CODENAME) stable" | \
  sudo tee /etc/apt/sources.list.d/docker.list > /dev/null

sudo apt update
sudo apt -y install docker-ce docker-ce-cli containerd.io docker-buildx-plugin docker-compose-plugin

# Let your user run docker
sudo usermod -aG docker $USER
newgrp docker
docker --version
docker compose versionPrepare directories and secrets
Create a working directory and a place for PostgreSQL data:
sudo mkdir -p /opt/umami/postgres
sudo chown -R $USER:$USER /opt/umami
cd /opt/umamiGenerate a strong app secret (used for signing):
APP_SECRET=$(openssl rand -hex 32); echo "$APP_SECRET"We’ll inject this into the service as an environment variable. Umami’s runtime uses APP_SECRET, DATABASE_URL, and optionally TRACKER_SCRIPT_NAME if you want to rename the client script to dodge some blockers.
Create docker-compose.yml
This file defines PostgreSQL for storage and Umami for the app. The official image variants include tags for PostgreSQL; compose handles migrations automatically on startup.
version: "3.9"

services:
  db:
    image: postgres:15-alpine
    container_name: umami-db
    environment:
      POSTGRES_DB: umami
      POSTGRES_USER: umami
      POSTGRES_PASSWORD: change_me_pg_password
    volumes:
      - ./postgres:/var/lib/postgresql/data
    healthcheck:
      test: ["CMD-SHELL", "pg_isready -U umami -d umami"]
      interval: 10s
      timeout: 5s
      retries: 5

  umami:
    image: ghcr.io/umami-software/umami:postgresql-latest
    container_name: umami-app
    depends_on:
      db:
        condition: service_healthy
    environment:
      DATABASE_URL: postgresql://umami:change_me_pg_password@db:5432/umami
      APP_SECRET: "paste_the_hex_secret_here"
      # Optional: rename the tracker script from the default script.js
      # TRACKER_SCRIPT_NAME: umami.js
    ports:
      - "3000:3000"
restart: unless-stoppedNotes: use a unique PostgreSQL password and the hex secret you generated. If you set TRACKER_SCRIPT_NAME, remember it when you embed the script later. (Env var semantics are in the Umami docs; the image and repo live under umami-software/umami.)
Start the stack:
docker compose up -d
docker compose logs -f umami-appWhen you see “ready” in the logs, the app is listening on http://<server-ip>:3000. We’ll put it behind Nginx + TLS next.
Put Nginx in front and enable HTTPS
Install Nginx and open web ports:
sudo apt -y install nginx
sudo ufw allow "Nginx Full"Create a server block for analytics.dropletdrift.com that proxies to the Umami container on localhost:3000:
sudo tee /etc/nginx/sites-available/umami.conf >/dev/null <<'NGINX'
server {
    listen 80;
    listen [::]:80;
    server_name analytics.dropletdrift.com;

    location / {
        proxy_pass http://127.0.0.1:3000;
        proxy_http_version 1.1;
        proxy_set_header Host               $host;
        proxy_set_header X-Real-IP          $remote_addr;
        proxy_set_header X-Forwarded-For    $proxy_add_x_forwarded_for;
        proxy_set_header X-Forwarded-Proto  $scheme;
    }
}
NGINX

sudo ln -s /etc/nginx/sites-available/umami.conf /etc/nginx/sites-enabled/umami.conf
sudo nginx -t && sudo systemctl reload nginxIssue a Let’s Encrypt certificate with Certbot’s Nginx plugin:
sudo apt -y install certbot python3-certbot-nginx
sudo certbot --nginx -d analytics.dropletdrift.com --agree-tos -m you@dropletdrift.com --redirectCertbot will install the certificate and add a 301 redirect to HTTPS; renewals are automatic via systemd timers.
First login and hardening
Visit https://analytics.dropletdrift.com. The default admin credentials are:
- username:
admin - password:
umami
Sign in and immediately change the password in Settings → Users; then create a second admin for break-glass recovery. This default is documented upstream and widely referenced—treat it as a known-bad credential until you rotate it.
Add your first website and embed the tracker
In Settings → Websites → Add website, register dropletdrift.com. Open the new site’s Edit page and copy the Website ID (a UUID). Add the script to your site’s <head>:
<script async defer data-website-id="YOUR-WEBSITE-ID"
src="https://analytics.dropletdrift.com/script.js"></script>If you set TRACKER_SCRIPT_NAME=umami.js, change the src accordingly:
<script async defer data-website-id="YOUR-WEBSITE-ID"
src="https://analytics.dropletdrift.com/umami.js"></script>The data-website-id tells Umami which site to record; renaming the script can help avoid simplistic blockers. You can further scope tracking with data-domains="dropletdrift.com" if you deploy to multiple hosts. See the environment-variable and tracker docs for details.
Upgrades, backups, and routine ops
Upgrade Umami safely. Pull the latest image, recreate the app, and keep the database volume intact:
cd /opt/umami
docker compose pull umami
docker compose up -dThe container runs migrations on startup; watch logs during the first minute after a version bump.
Back up PostgreSQL. A simple nightly pg_dump is usually enough for small instances:
mkdir -p ~/db-backups
docker exec -t umami-db pg_dump -U umami umami > ~/db-backups/umami-$(date +%F).sqlAutomate that with cron and ship to off-box storage.
Rotate secrets. If you ever change APP_SECRET, all sessions invalidate; plan it during a quiet window. Environment variable reference is in Umami’s docs.
Optional: Use DigitalOcean managed Postgres
For higher durability, point DATABASE_URL to a DO Managed Database and drop the local db service. You’ll provision the cluster in the DO control panel, create a database and user, and paste the connection string into DATABASE_URL. DigitalOcean’s older App Platform guide shows the same schema and pooling concepts; the pattern is identical when you run Umami on a Droplet.
Troubleshooting quick hits
- Tracker not loading at your custom name. Verify
TRACKER_SCRIPT_NAMEincludes.jsand matches the path you embed. Check reverse-proxy rewrites and TLS termination if you see 500s on the script URL. - No data arriving. Confirm the
data-website-idmatches the exact Website ID and that your site isn’t blocked bydata-domainsscoping in the tag. - Login issues. If you forgot the password immediately after install, the default is
admin / umami; change it in Users once inside.
What you now have
You’re running a modern, cookie-free analytics service on your own DigitalOcean Droplet: Docker for lifecycle, PostgreSQL with persistent volumes, Nginx for TLS, and clean separation between app and proxy. When you need to update, it’s a docker compose pull && up -d; when you need to scale, point multiple sites at the same instance. If you outgrow local Postgres, switch the DATABASE_URL to a managed cluster and keep everything else the same.


