


Hosting your own WordPress site on DigitalOcean is a solid choice if you’re looking for control, affordability, and scalability without handing everything over to a managed service. On top of my own experience with self-hosting, I’ve pulled together info from reliable sources like DigitalOcean’s own docs and some third-party guides to make this as thorough as possible.
We’ll cover the main ways to do it—one-click for quick setup, and manual for when you want to tweak things yourself. I’ll keep things straightforward, and I’ll reference back if something builds on what I said earlier. This should hold up over time since the core steps don’t change much, even as interfaces or versions evolve—just double-check DigitalOcean’s dashboard for any minor UI updates.
First off, why DigitalOcean? Their Droplets (that’s what they call their virtual servers) are cheap, starting around a few bucks a month, and you get full root access. Self-hosting means you’re responsible for everything from security to updates, but it also means no lock-in and better performance tweaks. Expect to spend an hour or two on setup if you’re new to this, and budget for ongoing maintenance like backups.
Prerequisites Before You Start
Before diving in, make sure you’ve got these basics covered. Skipping them can lead to headaches later.
- A DigitalOcean account. Sign up if you don’t have one—it’s free to start, and they often have credits for new users.
- A domain name (optional but recommended for a real site). Point its DNS A record to your Droplet’s IP once it’s created. Use your registrar’s panel or DigitalOcean’s DNS tools for this.
- Basic comfort with SSH and the command line. If not, brush up on a quick tutorial—it’s essential for secure access.
- SSH key pair for authentication (safer than passwords). Generate one on your local machine if you haven’t.
- Budget: A basic Droplet with 1GB RAM works for small sites, but go for 2GB+ if you expect traffic.
Once that’s sorted, log into your DigitalOcean dashboard and let’s create a Droplet. Choose Ubuntu (latest LTS version, like 24.04 or whatever’s current) as the OS—it’s stable and well-supported for WordPress.
Method 1: The Easy Way—One-Click WordPress Install
If you’re just getting started or want something up fast, use DigitalOcean’s one-click app. It pre-installs WordPress on a LAMP stack (Linux, Apache, MySQL, PHP), plus extras like a firewall. This is great for testing or simple sites, but remember, it’s still self-hosted—you handle updates.
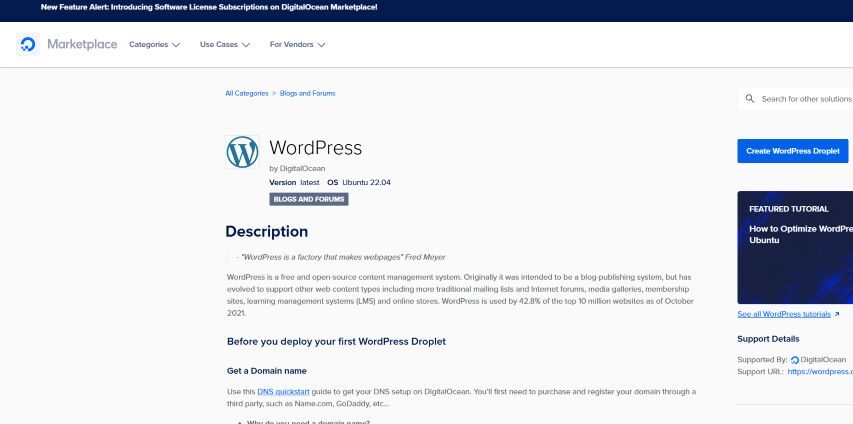
Head to the Marketplace in your dashboard and search for “WordPress.” Select it, pick your Droplet size (at least 1GB RAM), region (closest to your audience for speed), and add your SSH key. Enable backups if you want automated snapshots—they’re cheap insurance. Hit create, and wait a minute or two.
Once it’s live, grab the IP from the dashboard. Open a terminal and SSH in as root:
ssh root@your_droplet_ipYou’ll see a setup prompt. Follow it: enter your domain (or IP if no domain yet), admin email, username, password, and site title. Say yes to Let’s Encrypt for free SSL—it’ll secure your site with HTTPS automatically. If you skipped a domain, you can add one later via DNS and rerun the setup script.
After that, visit your IP or domain in a browser. You’ll see the WordPress admin login at /wp-admin. Log in with the creds you set, and you’re in—install themes, plugins, whatever. The one-click includes UFW (firewall) blocking everything but SSH, HTTP, and HTTPS, and Fail2ban to block brute-force attacks. Solid out of the box.
For database access if needed (like backups), check /root/.digitalocean_password for the MySQL root pass. Log in with:
mysql -u root -pAnd paste the pass when prompted.
This method’s quick, but if you want more control—like using Nginx instead of Apache—skip to the manual method below. Also, always update WordPress and plugins from the dashboard regularly; vulnerabilities pop up.
Method 2: Manual Install with a LAMP Stack
For full customization, set up everything yourself on a plain Ubuntu Droplet. This gives you the LAMP stack from scratch, which is evergreen since it’s standard. It’s more steps, but you’ll learn the guts of your setup.
Create a basic Ubuntu Droplet as I mentioned in prerequisites—no one-click. SSH in as root, then create a non-root sudo user for safety:
adduser yourusername
usermod -aG sudo yourusernameSwitch to that user:
su - yourusernameUpdate packages:
sudo apt update && sudo apt upgrade -yInstall the LAMP stack. Start with Apache:
sudo apt install apache2 -y
sudo ufw allow 'Apache Full'
sudo systemctl enable apache2Then MySQL:
sudo apt install mysql-server -y
sudo mysql_secure_installationFollow the prompts to secure it—enable plugin, remove anon users, etc. Set a strong root password.
PHP next (get the latest compatible with WordPress, like 8.1 or newer):
sudo apt install php libapache2-mod-php php-mysql -yPlus extras WordPress loves:
sudo apt install php-curl php-gd php-mbstring php-xml php-xmlrpc php-soap php-intl php-zip -yRestart Apache:
sudo systemctl restart apache2Now, database setup for WordPress. Log into MySQL:
sudo mysqlCreate DB and user (replace ‘password’ with something strong):
CREATE DATABASE wordpress DEFAULT CHARACTER SET utf8 COLLATE utf8_unicode_ci;
CREATE USER 'wpuser'@'localhost' IDENTIFIED BY 'password';
GRANT ALL PRIVILEGES ON wordpress.* TO 'wpuser'@'localhost';
FLUSH PRIVILEGES;
EXIT;Download WordPress. Go to your web root (usually /var/www/html):
cd /var/www/html
sudo curl -O https://wordpress.org/latest.tar.gz
sudo tar xzvf latest.tar.gz
sudo mv wordpress/* .
sudo rm -rf wordpress latest.tar.gzSet permissions:
sudo chown -R www-data:www-data /var/www/html
sudo find /var/www/html -type d -exec chmod 750 {} \;
sudo find /var/www/html -type f -exec chmod 640 {} \;Configure WordPress. Copy the sample config:
sudo cp wp-config-sample.php wp-config.php
sudo nano wp-config.phpEdit the DB details:
define('DB_NAME', 'wordpress');
define('DB_USER', 'wpuser');
define('DB_PASSWORD', 'password');
define('DB_HOST', 'localhost');Add unique salts from https://api.wordpress.org/secret-key/1.1/salt/ — paste them in the keys section.
For Apache tweaks, enable rewrites for pretty permalinks:
sudo a2enmod rewriteEdit your site config (/etc/apache2/sites-available/000-default.conf) to allow overrides:
sudo nano /etc/apache2/sites-available/000-default.confAdd inside :
<Directory /var/www/html/>
    AllowOverride All
</Directory>Test and restart:
sudo apache2ctl configtest
sudo systemctl restart apache2If you have a domain, set up a virtual host file instead of using default. Point DNS, then create /etc/apache2/sites-available/yourdomain.conf with similar config, enable it with a2ensite, disable default, restart.
For SSL, install Certbot:
sudo apt install certbot python3-certbot-apache -y
sudo certbot --apacheFollow prompts for your domain—it’ll handle HTTPS.
Finally, visit your IP or domain. Run the WordPress installer wizard: pick language, enter site details, and done. Log in at /wp-admin.
This mirrors what I said about the one-click but gives you flexibility—like swapping Apache for Nginx if you prefer (that’s LEMP; similar steps but use nginx instead, and adjust configs for PHP-FPM).
Alternatives to Consider
If LAMP feels old-school, try LEMP for better performance with high traffic—replace Apache with Nginx, and use php-fpm. Steps are almost identical, but configs go in /etc/nginx/sites-available. Or go containerized with Docker Compose for isolation. Create a docker-compose.yml with services for WordPress, MySQL, and Nginx, like:
version: '3'
services:
  db:
    image: mysql:8.0
    volumes:
      - db_data:/var/lib/mysql
    restart: always
    environment:
      MYSQL_ROOT_PASSWORD: somewordpress
      MYSQL_DATABASE: wordpress
      MYSQL_USER: wordpress
      MYSQL_PASSWORD: wordpress

  wordpress:
    depends_on:
      - db
    image: wordpress:latest
    volumes:
      - wordpress_data:/var/www/html
    ports:
      - "8000:80"
    restart: always
    environment:
      WORDPRESS_DB_HOST: db:3306
      WORDPRESS_DB_USER: wordpress
      WORDPRESS_DB_PASSWORD: wordpress
      WORDPRESS_DB_NAME: wordpress
volumes:
  db_data: {}
wordpress_data: {}Run docker-compose up -d, and access at your IP:8000. Add Certbot for SSL.
Security and Best Practices
No matter the method, security isn’t optional—WordPress is a target. From what I gathered, start with SSH keys only (disable password logins in /etc/ssh/sshd_config). Set up UFW:
sudo ufw allow OpenSSH
sudo ufw allow 80/tcp
sudo ufw allow 443/tcp
sudo ufw enableInstall Fail2ban:
sudo apt install fail2ban -y
sudo systemctl enable fail2banEnable auto-updates for Ubuntu packages:
sudo apt install unattended-upgrades -y
sudo dpkg-reconfigure --priority=low unattended-upgradesFor WordPress, use strong passwords, limit login attempts with plugins like Limit Login Attempts, and scan for malware. Back up regularly—use DigitalOcean’s snapshots or plugins like UpdraftPlus to store off-site. Monitor with their free metrics tool.
Optimize by caching (plugins like WP Super Cache), using a CDN like Cloudflare, and scaling your Droplet as needed. Keep everything updated; set auto-updates for minor WordPress releases in wp-config.php:
define('WP_AUTO_UPDATE_CORE', 'minor');If issues arise, check logs: /var/log/apache2/error.log for LAMP, or docker logs for containers.
There you have it—a complete path to self-hosting. If your site’s growing, consider managed options like Cloudways on top of DigitalOcean for less hassle, but this keeps it pure self-hosted. Hit me up in the comments if something’s unclear.


 in PostgreSQL 18")